Create a new class on Flat for Education
Last updated May 19, 2026
In this guide, you will learn how to create and configure a new class in Flat for Education so you can easily organize your rosters, share custom interactive scores, and design digital music assignments.
To get started, make sure you have already created a Flat for Education teacher account. If your school is already using Flat for Education, simply ask your school admin to send you an invitation to join.
💡 Important Note for Canvas, Moodle, Schoology, Blackboard, and LTI users:
If you plan to sync your roster directly with an external Learning Management System (LMS) using LTI:
- Your school's IT or LMS administrator must complete the LTI 1.3 or LTI 1.1 setup first.
- Once installed, your classes can be linked automatically during the creation step below.
- Find step-by-step instructions in our Integrations help section.
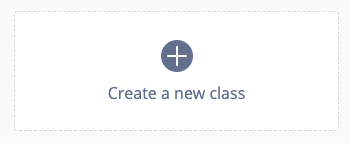
1. Open "Classes"
- Log into your dashboard on Flat for Education.
- Click on the "Classes" tab located on the left-side navigation panel.
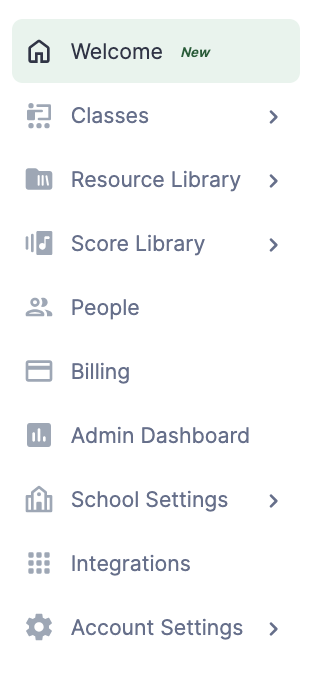
- Click the "Create a new class" button located in the center of your display.
🎯 What is the purpose of a class?
Creating a class allows you to quickly organize, distribute, and grade assignments. We highly recommend following the same organization as you have in your "real" classroom.
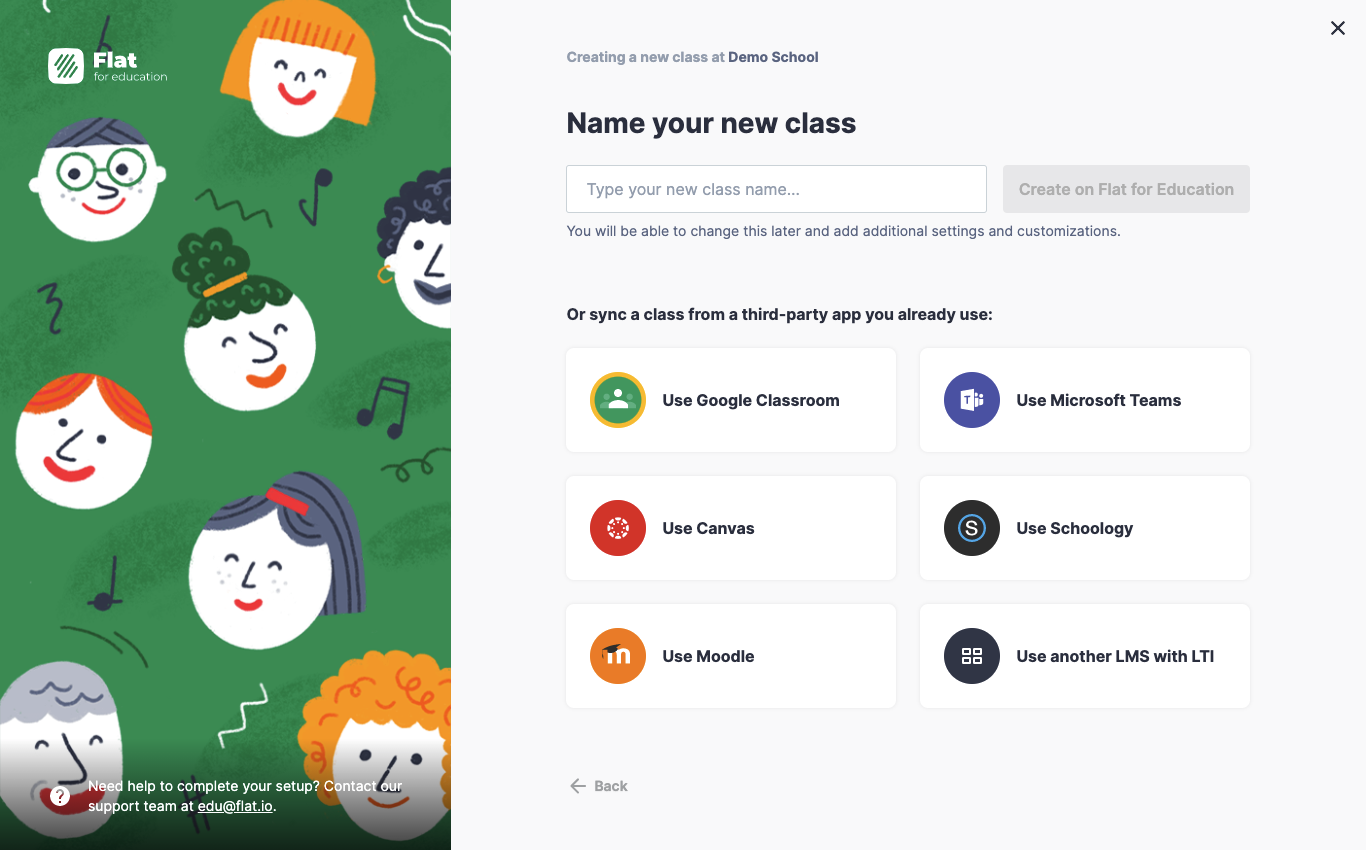
2. Name your new class
Type a clear identifier for your course. Depending on your school setup, you can generate the class environment in multiple ways:
- Create your class natively on Flat: Type a name and click "Create".
- Sync with an LMS: Automatically import your existing rosters using Google Classroom, Microsoft Teams, Canvas, or Schoology.
Tip: Using a third-party LMS integration automatically creates and updates accounts for your students, saving you manual data entry!
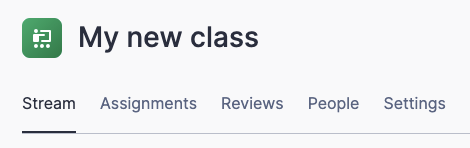
Once created, your new classroom environment features four core tabs:
- Stream: Easily broadcast read-only music scores, announcements, or general resources directly to your students.
- Assignments: Build interactive, auto-graded music worksheets and composition tasks. (Learn more on our dedicated assignments help page).
- People: Add, invite, audit, and manage student rosters or co-teachers.
- Settings: Rename, customize, archive, or remove your course entirely.
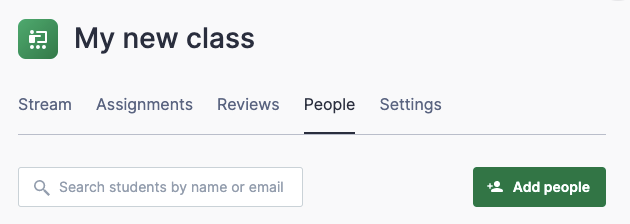
3. Add students to your new class
To populate your classroom roster:
- Select the People tab in your top navigation menu.
- Click the Add People button.
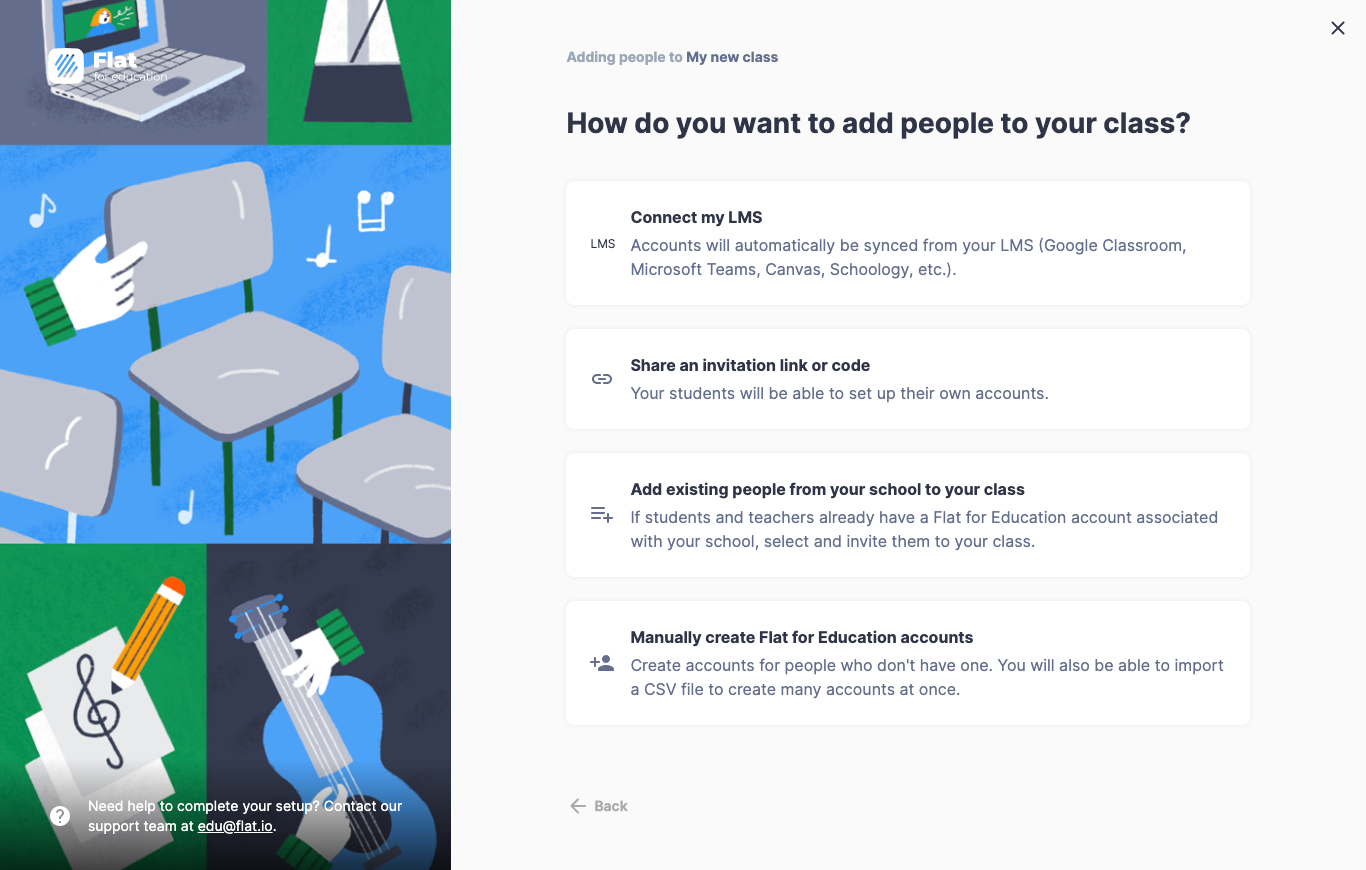
Select your preferred enrollment method from the modal window options:
For a deep dive into join codes, invitation links, or manual inputs, read our comprehensive student invitation guide.
Video Tutorial
Watch the video tutorial below for a visual walk-through of the complete classroom creation workflow:
(Can't watch the video? Many school networks block video streaming. Don't worry—all required steps are written in full text above!)
What's next?
Now that your classroom environment is ready and your students are enrolled, discover how to build your very first learning exercise in our Activities and Assignments guide!