Die Ressourcenbibliothek
Verwalten und organisieren Sie Ihre Aufgaben effizient in Flat for Education.
Die Ressourcenbibliothek ist Ihr zentrales Zentrum zum Erstellen, Anzeigen und Organisieren von Aufgaben. Sie ist leicht über das Menü auf der linken Seite Ihres Dashboards zugänglich und hilft Ihnen, Ihren Arbeitsablauf zu optimieren und die Zusammenarbeit mit Kollegen zu verbessern.
Hauptmerkmale
- Organisation: Gruppieren Sie Aufgaben in benutzerdefinierte Ordner für eine einfache Navigation und Abruf.
- Inspiration: Entdecken Sie vorgefertigte Beispielaufgaben (FFE Assignments) für Ideen und neue Möglichkeiten.
- Zusammenarbeit: Teilen Sie Aufgaben nahtlos mit Kollegen, um Teamarbeit und Effizienz zu verbessern.
- Erstellung: Erstellen Sie einfach eine neue Aufgabe, indem Sie auf die Schaltfläche "+ Neue Aufgabe" in der oberen rechten Ecke Ihrer Seite klicken. Sie können dann aus einer Vielzahl von Aufgabentypen wählen, die Ihren Bedürfnissen entsprechen.
Navigation in der Ressourcenbibliothek
Die Ressourcenbibliothek ist in drei Abschnitte unterteilt:

- Meine Aufgaben: Ihre persönlichen Aufgaben, organisiert nach Ordnern oder Listenansicht.
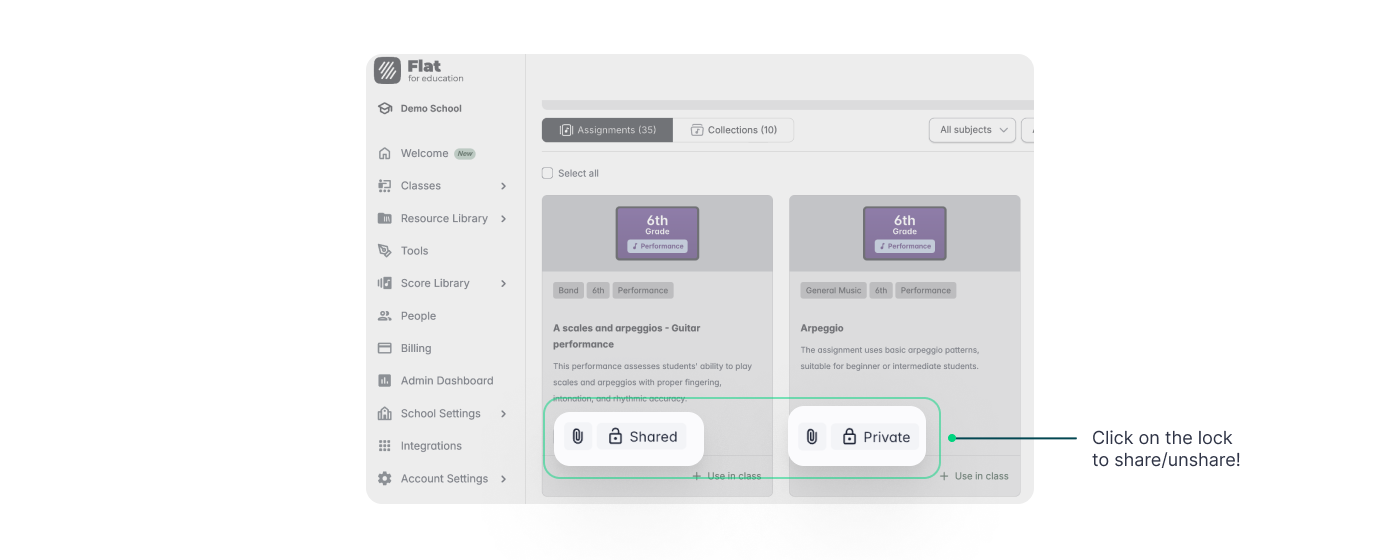
- Geteilte Aufgaben: Greifen Sie auf Aufgaben zu, die von Kollegen innerhalb Ihrer Organisation mit Ihnen geteilt wurden, und sehen Sie Aufgaben, die Sie mit anderen geteilt haben.
- FFE Assignments: Eine Sammlung von einsatzbereiten Aufgaben, die vom Flat for Education-Team erstellt wurden. Verwenden Sie sie unverändert oder passen Sie sie an Ihre Bedürfnisse an.
Filteroptionen
Ein leistungsstarkes Filtersystem ermöglicht es Ihnen, schnell bestimmte Aufgaben zu finden. Filtern Sie nach Fach, Klassenstufe oder Aufgabentyp, um Ihre Bibliothek effizienter zu durchsuchen.
Um die Effektivität der Filter zu maximieren, sollten Sie Aufgaben beim Erstellen taggen.

Teilen und Zusammenarbeit
Die Ressourcenbibliothek fördert die Zusammenarbeit, indem sie das Teilen von Aufgaben und den Zugriff auf Ressourcen von Kollegen erleichtert.
- Aufgaben teilen: Teilen Sie einzelne Aufgaben einfach mit anderen Lehrern.
- Zum Teilen: In "Meine Aufgaben" über eine Aufgabe fahren, auf die drei Punkte klicken und "Teilen" auswählen. Füllen Sie die Details aus und bestätigen Sie. Die Aufgabe erscheint nun in "Geteilte Aufgaben" und wird als geteilt markiert.
- Zum Aufheben der Freigabe: Über eine geteilte Aufgabe fahren, auf die drei Punkte klicken und "Freigabe aufheben" auswählen. Benutzer, die sie zuvor gespeichert haben, haben weiterhin Zugriff in ihren Bibliotheken.

- Sammlungen teilen: Teilen Sie ganze Ordner mit Aufgaben mit Kollegen, um Gruppen verwandter Ressourcen effizient zu teilen.

Teilen Sie ganze Ordner mit Aufgaben einfach mit Kollegen für eine effiziente Zusammenarbeit.
- Zum Teilen einer Sammlung: Über eine Sammlung fahren, auf die drei Punkte in der oberen rechten Ecke klicken und "Teilen" auswählen. Dies gewährt Kollegen Zugriff auf alle Aufgaben im Ordner. Diese Aufgaben erscheinen an zwei Stellen:
- Sammlungsabschnitt: Gruppiert innerhalb der geteilten Sammlung.
- Aufgabenabschnitt: Einzelne Auflistung neben anderen Aufgaben für einfaches Durchsuchen.
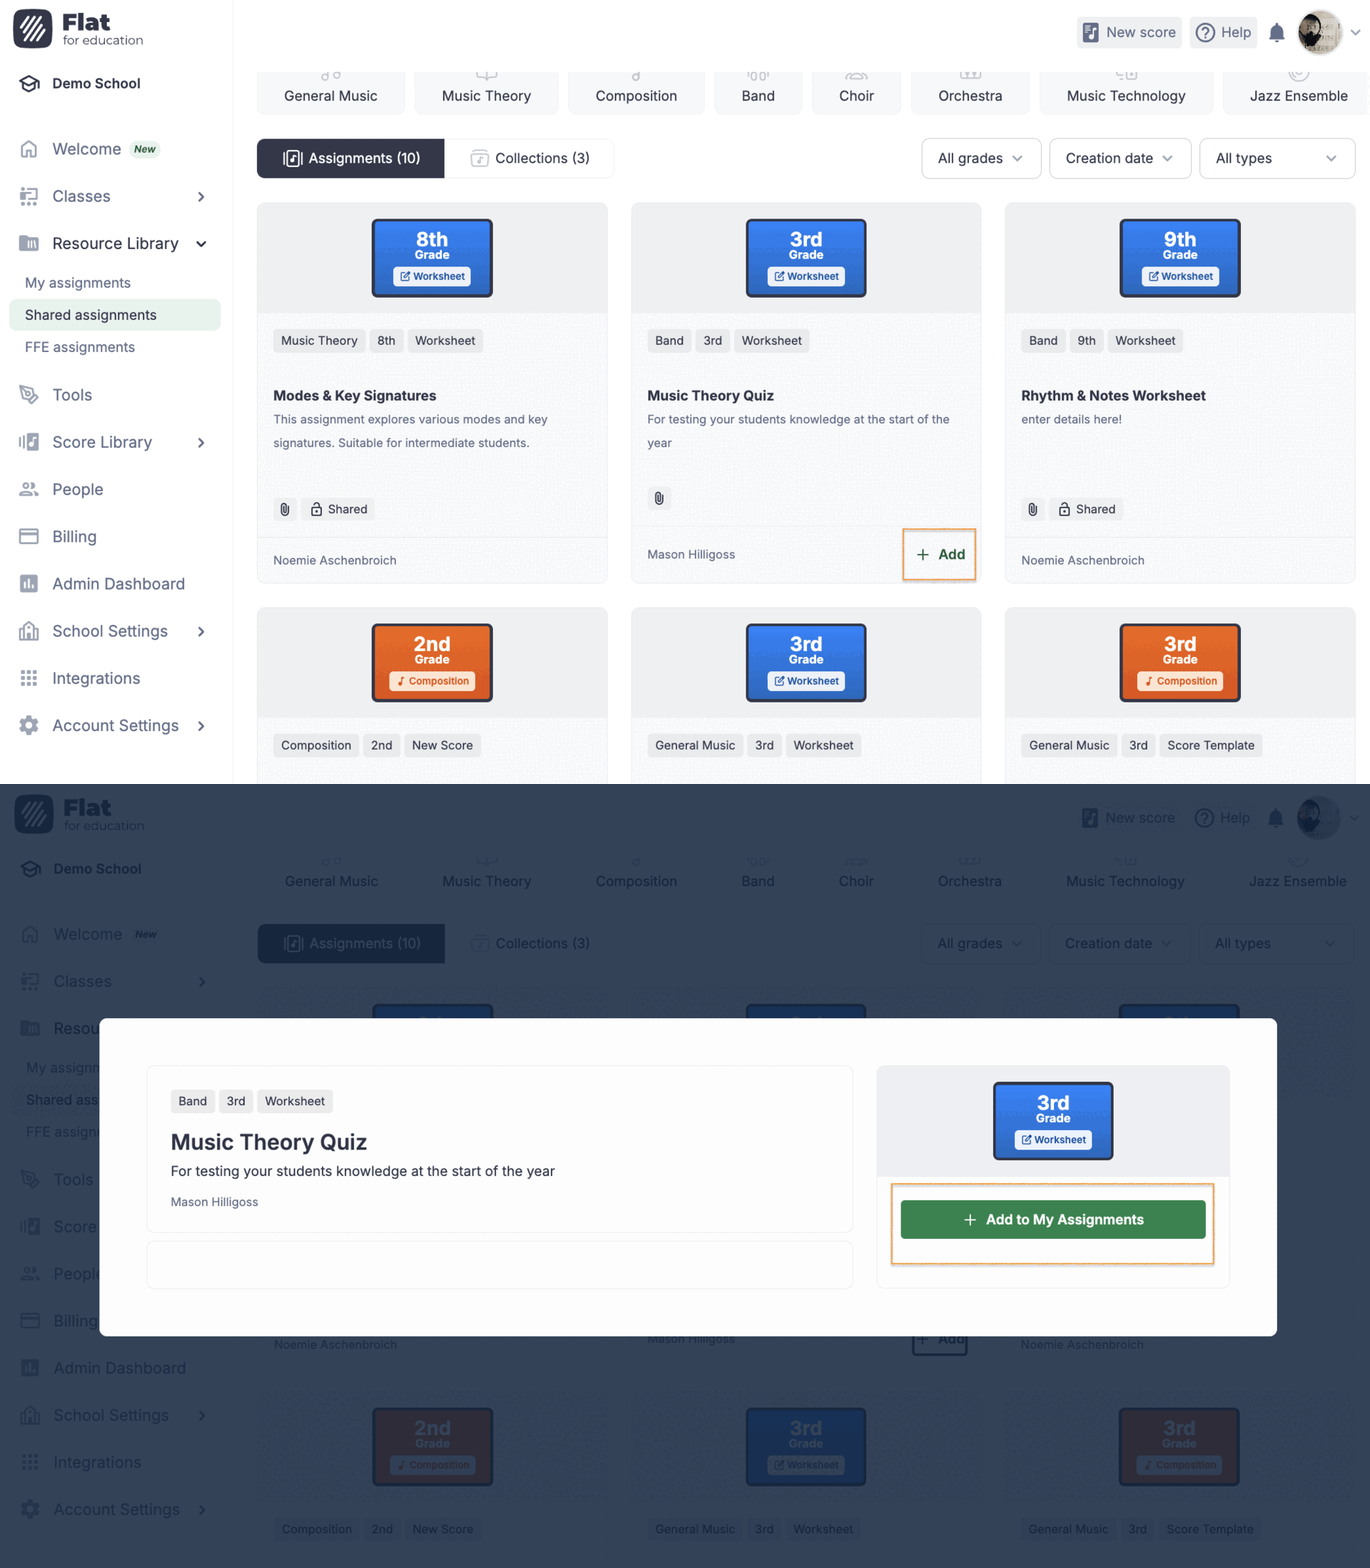
- Hinzufügen geteilter Aufgaben:
Fügen Sie schnell jede geteilte Aufgabe zu Ihrer eigenen Bibliothek hinzu, um einfachen Zugriff und zukünftige Nutzung zu gewährleisten.
- Zum Hinzufügen einer Aufgabe: Die geteilte Aufgabe finden, auf "+ Hinzufügen" klicken und "Zu Meine Aufgaben hinzufügen" auswählen. Sobald hinzugefügt, können Sie sie öffnen, bearbeiten und Ihren Klassen zuweisen, wie benötigt.

Diese Seite wurde automatisch aus dem Englischen übersetzt. Englische Originalversion ansehen.