La Bibliothèque de Ressources
Gérez et organisez efficacement vos devoirs dans Flat for Education.
La Bibliothèque de Ressources est votre centre principal pour créer, visualiser et organiser des devoirs. Facilement accessible depuis le menu de gauche de votre tableau de bord, elle vous aide à rationaliser votre flux de travail et à améliorer la collaboration avec vos collègues.
Fonctionnalités Clés
- Organisation : Regroupez les devoirs dans des dossiers personnalisés pour une navigation et une récupération faciles.
- Inspiration : Explorez des exemples de devoirs préfabriqués (Devoirs FFE) pour des idées et de nouvelles possibilités.
- Collaboration : Partagez facilement des devoirs avec des collègues pour améliorer le travail d'équipe et l'efficacité.
- Création : Créez facilement un nouveau devoir en cliquant sur le bouton "+ Nouveau Devoir" en haut à droite de votre page. Vous pourrez ensuite choisir parmi une variété de types de devoirs pour répondre à vos besoins.
Navigation dans la Bibliothèque de Ressources
La Bibliothèque de Ressources est divisée en trois sections :

- Mes Devoirs : Vos devoirs personnels, organisés par dossiers ou en vue liste.
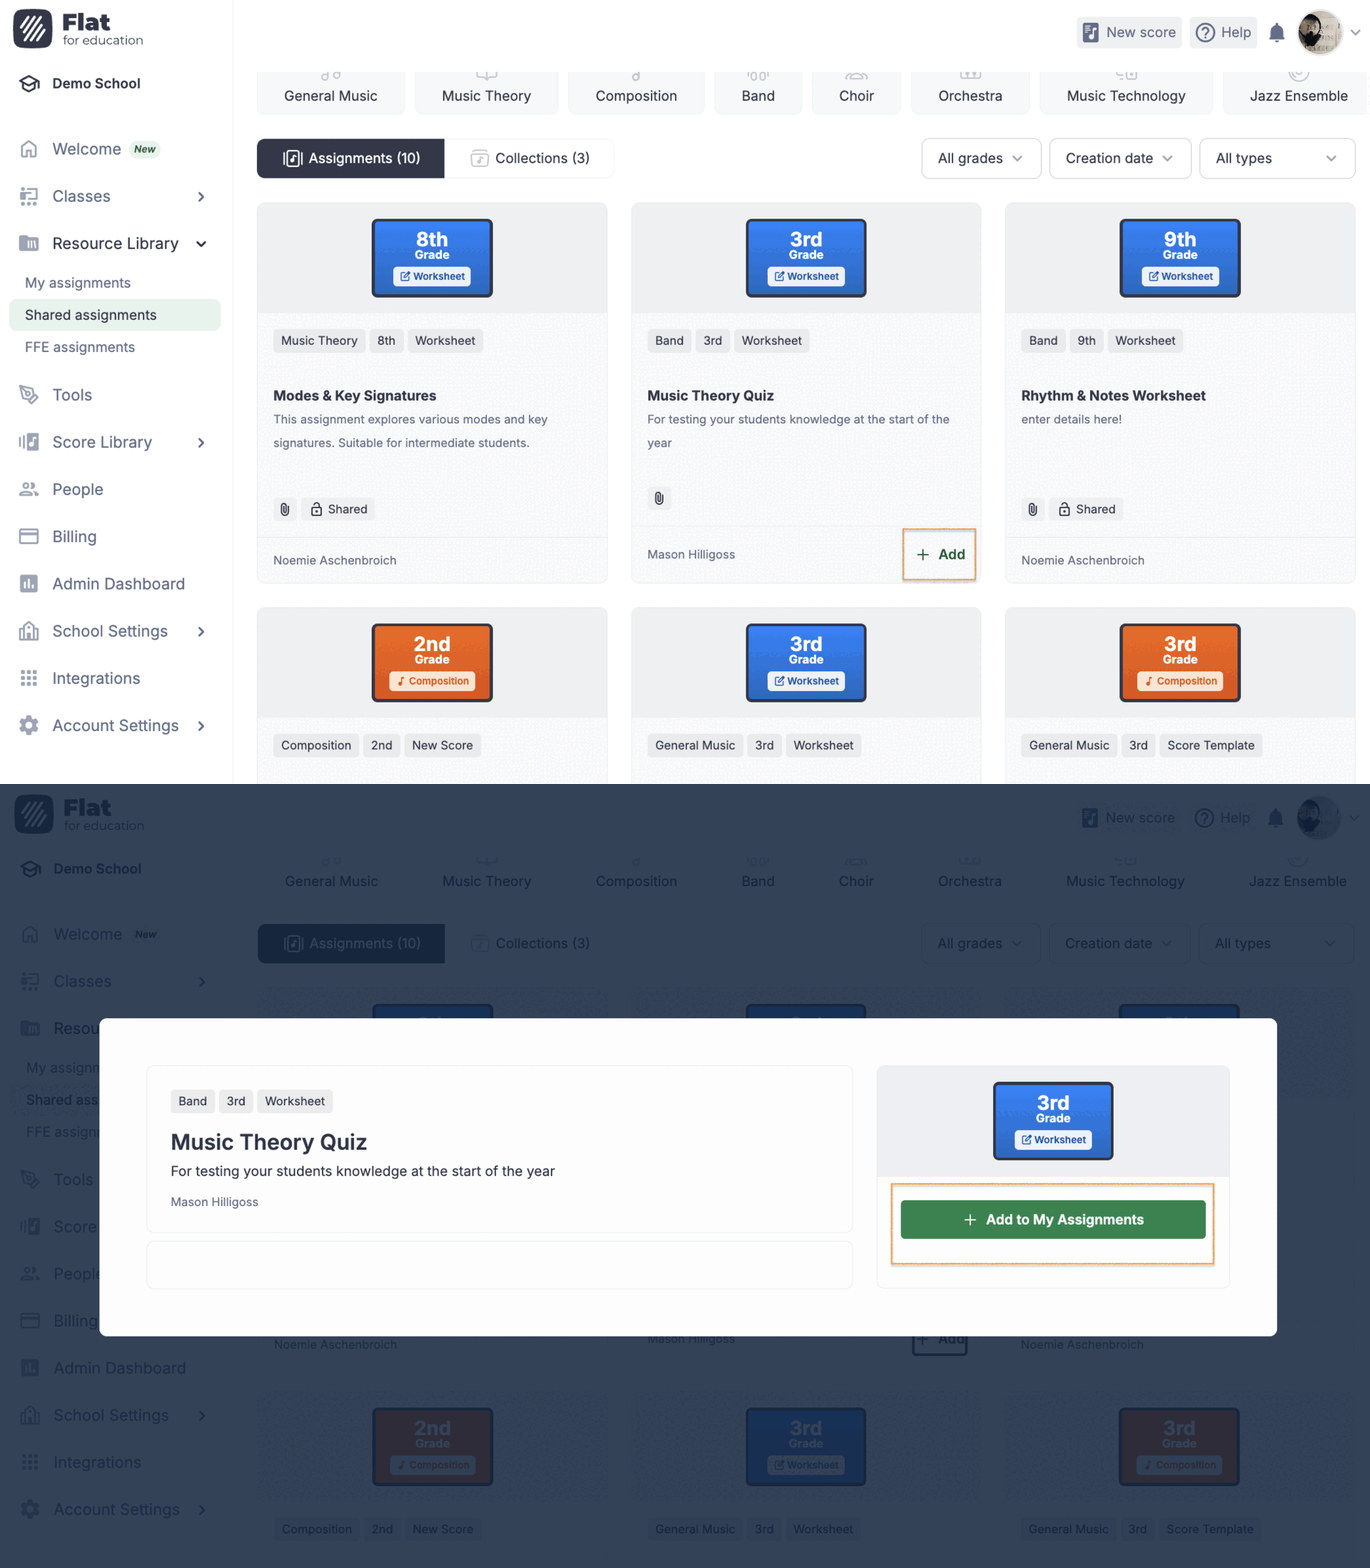
- Devoirs Partagés : Accédez aux devoirs partagés avec vous par des collègues au sein de votre organisation, et visualisez les devoirs que vous avez partagés avec d'autres.
- Devoirs FFE : Une collection de devoirs prêts à l'emploi créés par l'équipe de Flat for Education. Utilisez-les tels quels ou personnalisez-les pour répondre à vos besoins.
Options de Filtrage
Un puissant système de filtrage vous permet de trouver rapidement des devoirs spécifiques. Filtrez par sujet, niveau scolaire ou type de devoir pour naviguer plus efficacement dans votre bibliothèque.
Pour maximiser l'efficacité des filtres, assurez-vous de taguer les devoirs lors de leur création.

Partage et Collaboration
La Bibliothèque de Ressources favorise la collaboration, facilitant le partage de devoirs et l'accès aux ressources de collègues.
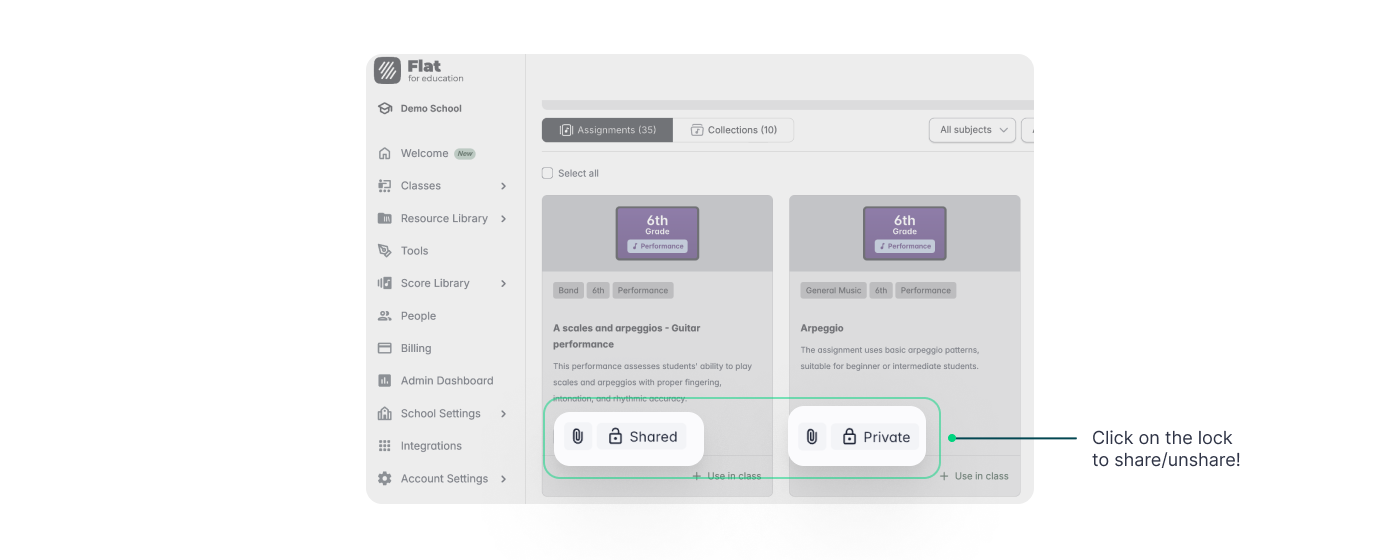
- Partage de Devoirs : Partagez facilement des devoirs individuels avec d'autres enseignants.
- Pour Partager : Dans Mes Devoirs, survolez un devoir, cliquez sur les trois points et sélectionnez "Partager". Remplissez les détails et confirmez. Le devoir apparaîtra maintenant dans "Devoirs Partagés" et sera marqué comme partagé.
- Pour Ne Plus Partager : Survolez un devoir partagé, cliquez sur les trois points et sélectionnez "Ne Plus Partager". Les utilisateurs qui l'avaient précédemment enregistré y auront toujours accès dans leurs bibliothèques.

- Partage de Collections : Partagez des dossiers entiers de devoirs avec des collègues pour partager efficacement des groupes de ressources liées.

Partagez facilement des dossiers entiers de devoirs avec des collègues pour une collaboration efficace.
- Pour Partager une Collection : Survolez une collection, cliquez sur les trois points en haut à droite et sélectionnez "Partager". Cela donne accès à tous les devoirs du dossier aux collègues. Ces devoirs apparaîtront à deux endroits :
- Section Collections : Groupés au sein de la collection partagée.
- Section Devoirs : Listés individuellement aux côtés d'autres devoirs pour une navigation facile.
- Ajout de Devoirs Partagés :
Ajoutez rapidement tout devoir partagé à votre propre bibliothèque pour un accès facile et une utilisation future.
- Pour Ajouter un Devoir : Localisez le devoir partagé, cliquez sur "+ Ajouter", et sélectionnez "Ajouter à Mes Devoirs". Une fois ajouté, vous pouvez l'ouvrir, le modifier et l'assigner à vos classes selon vos besoins.

Cette page a été automatiquement traduite de l'anglais. Voir la version originale en anglais.