How to create custom instrument configurations in Flat
Last updated October 13, 2026
A custom instrument in Flat is an instrument configuration you create and save directly to your Flat account. Once created, these instruments can be used when starting a new score or when changing instruments in existing scores, so you never have to set the same staves, transposition, tuning, or percussion mapping twice.
How do I create a custom instrument?
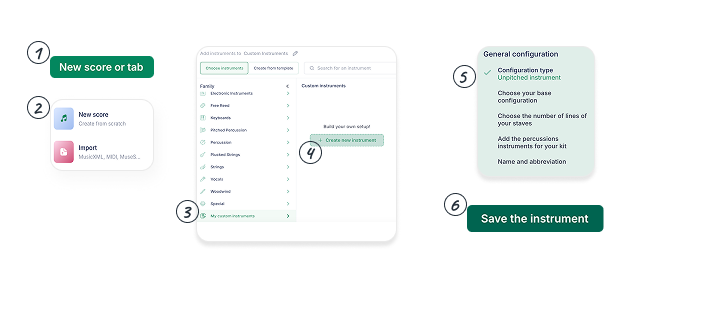
You can manage your custom instruments from the Score Library when creating a new score. Here's how to get started:
- Go to your Score Library and click New Score
- In the instrument selection panel, click Choose Instruments
- Scroll to the bottom and select Create a custom instrument
- Set your instrument's pitch range, name, and sound family
- Click Save to store it in your account for future use
Your custom instruments will now be available whenever you're creating or editing a score!
Below, you can learn how to create the configurations for:
What can I configure on a pitched instrument?
Custom pitched instruments allow you to create a complete configuration of your instruments: a base instrument to start from, the staves and clefs, the transposition mode, the tablature and its tuning, the playback sound, and the default part name and abbreviation. Each one is a step in the editor.
1. Base instrument
You can choose first a base instrument to build your custom instrument. Choose a base instrument to quickly re-use all the settings from an instrument and only change the settings you want. For example, if you only want to have a custom name, always use a specific tuning on your TAB, or create an instrument with a different transposition mode.
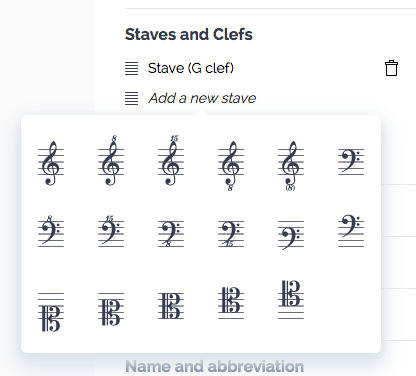
2. Staves and Clefs
Choose the staves and clefs of your instrument.
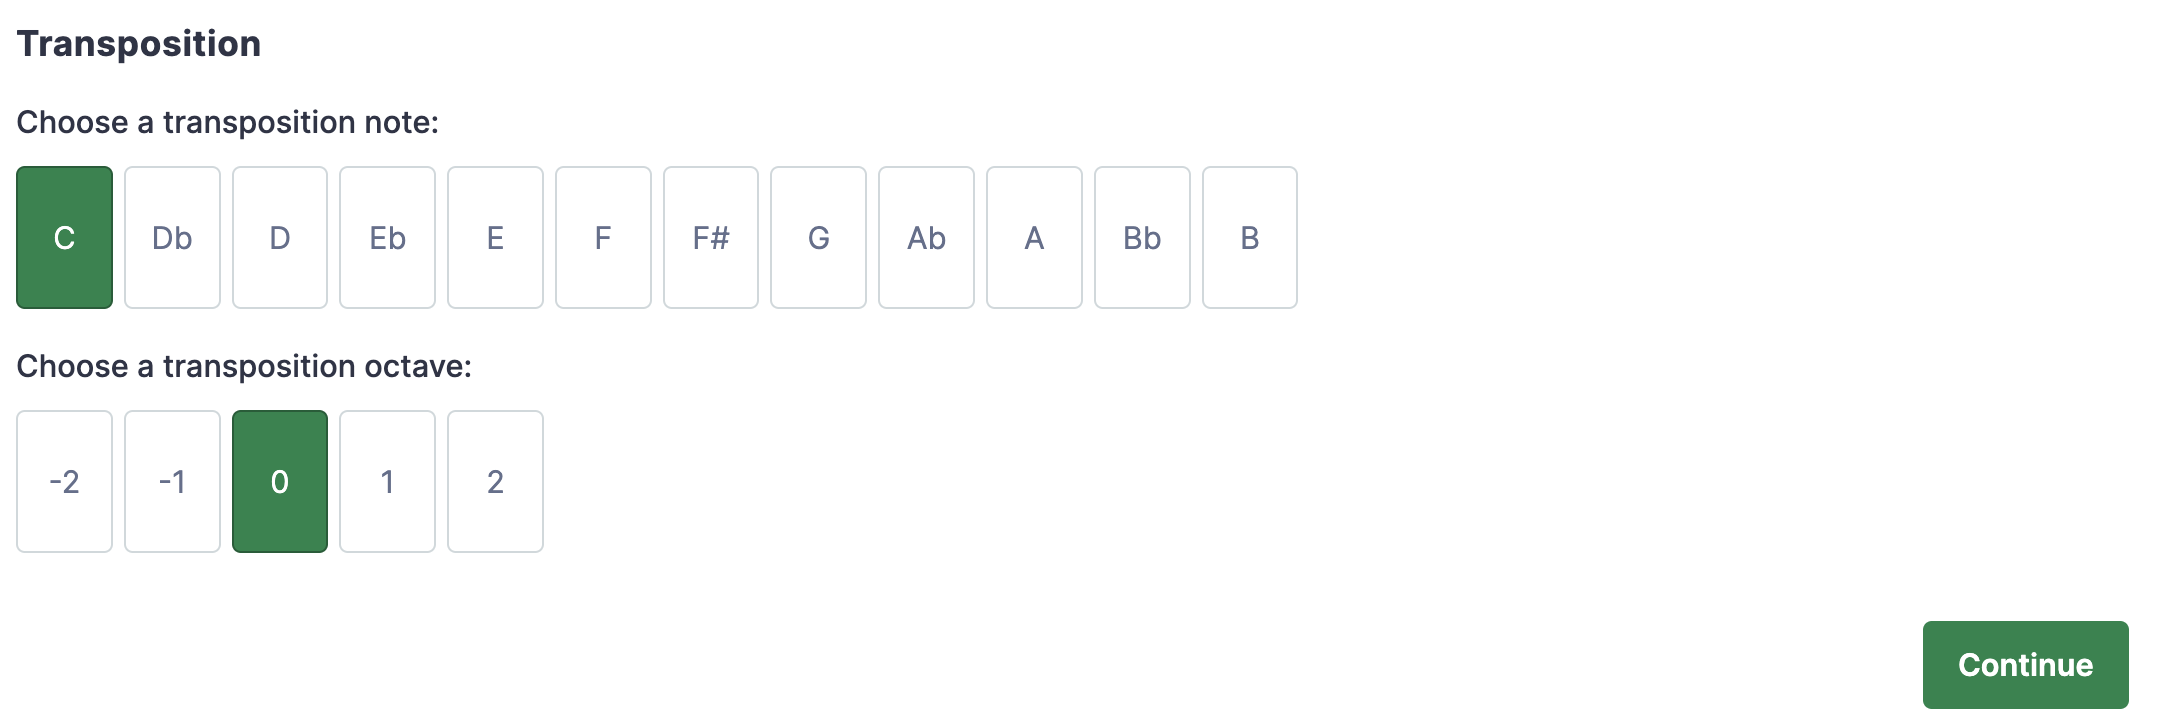
3. Transposition mode
Choose then the transposition mode: the note and octave. If your instrument is non-transposing (plays in concert pitch), choose C and 0.
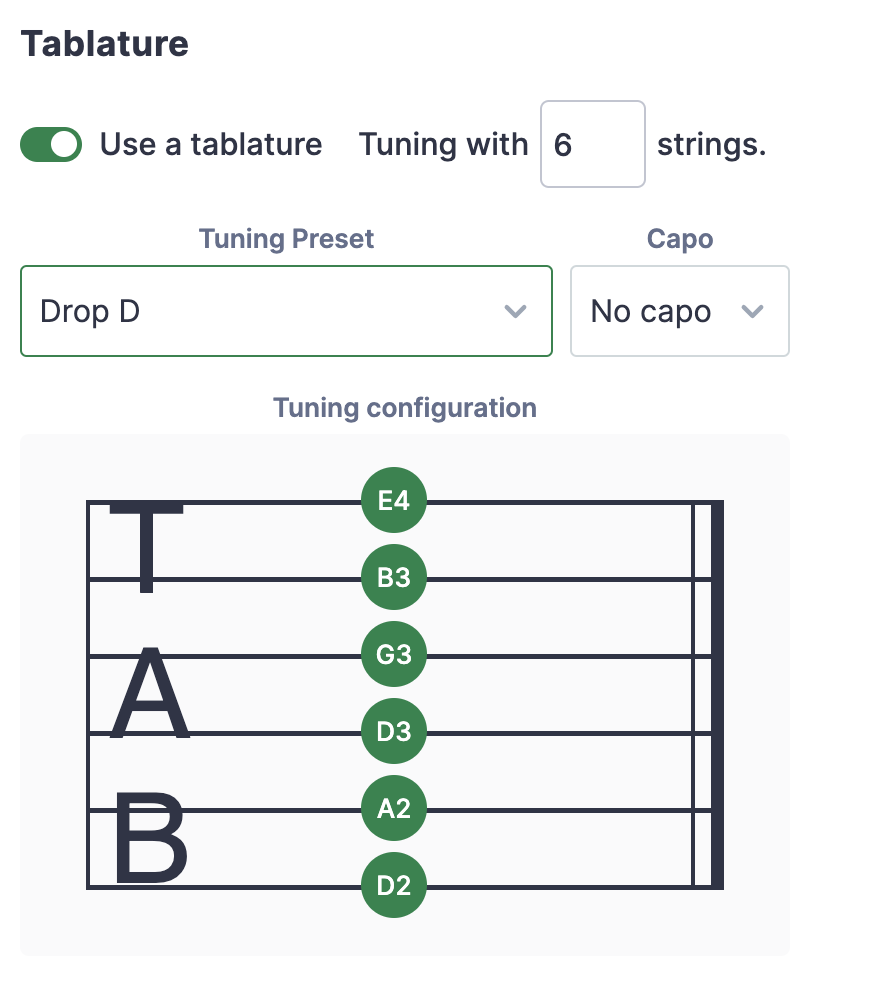
4. Tablature configuration
You can then completely configure the tablature of the instrument. Choose first how many strings your plucked string instrument has (at this time we allow from 4 to 14 strings), its complete tuning and capo.
5. Sound
Choose finally the sound of the instrument for our playback.
6. Part name and abbreviation
Set the default part name and abbreviation that will be printed on your scores.
What can I configure on an unpitched instrument?
Custom unpitched instruments (in beta) include the staves settings, different percussion elements, their mapping and keyboard shortcuts to use them. You start from a base instrument, choose how many lines the staff has, then place each percussion instrument on its own line with its own notehead.
1. Base instrument
You can choose first a base instrument to build your custom instrument. Choose a base instrument to quickly re-use all the settings from an instrument and only change the settings you want. For example, if you want to make small changes to our preset drumset, you can start your custom drumset from our configuration.
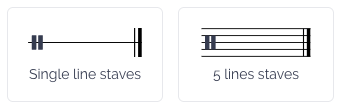
2. Number of lines for your staves
Choose if your unpitched part will have staves with 1 or 5 lines.
3. Percussions instruments for your kit
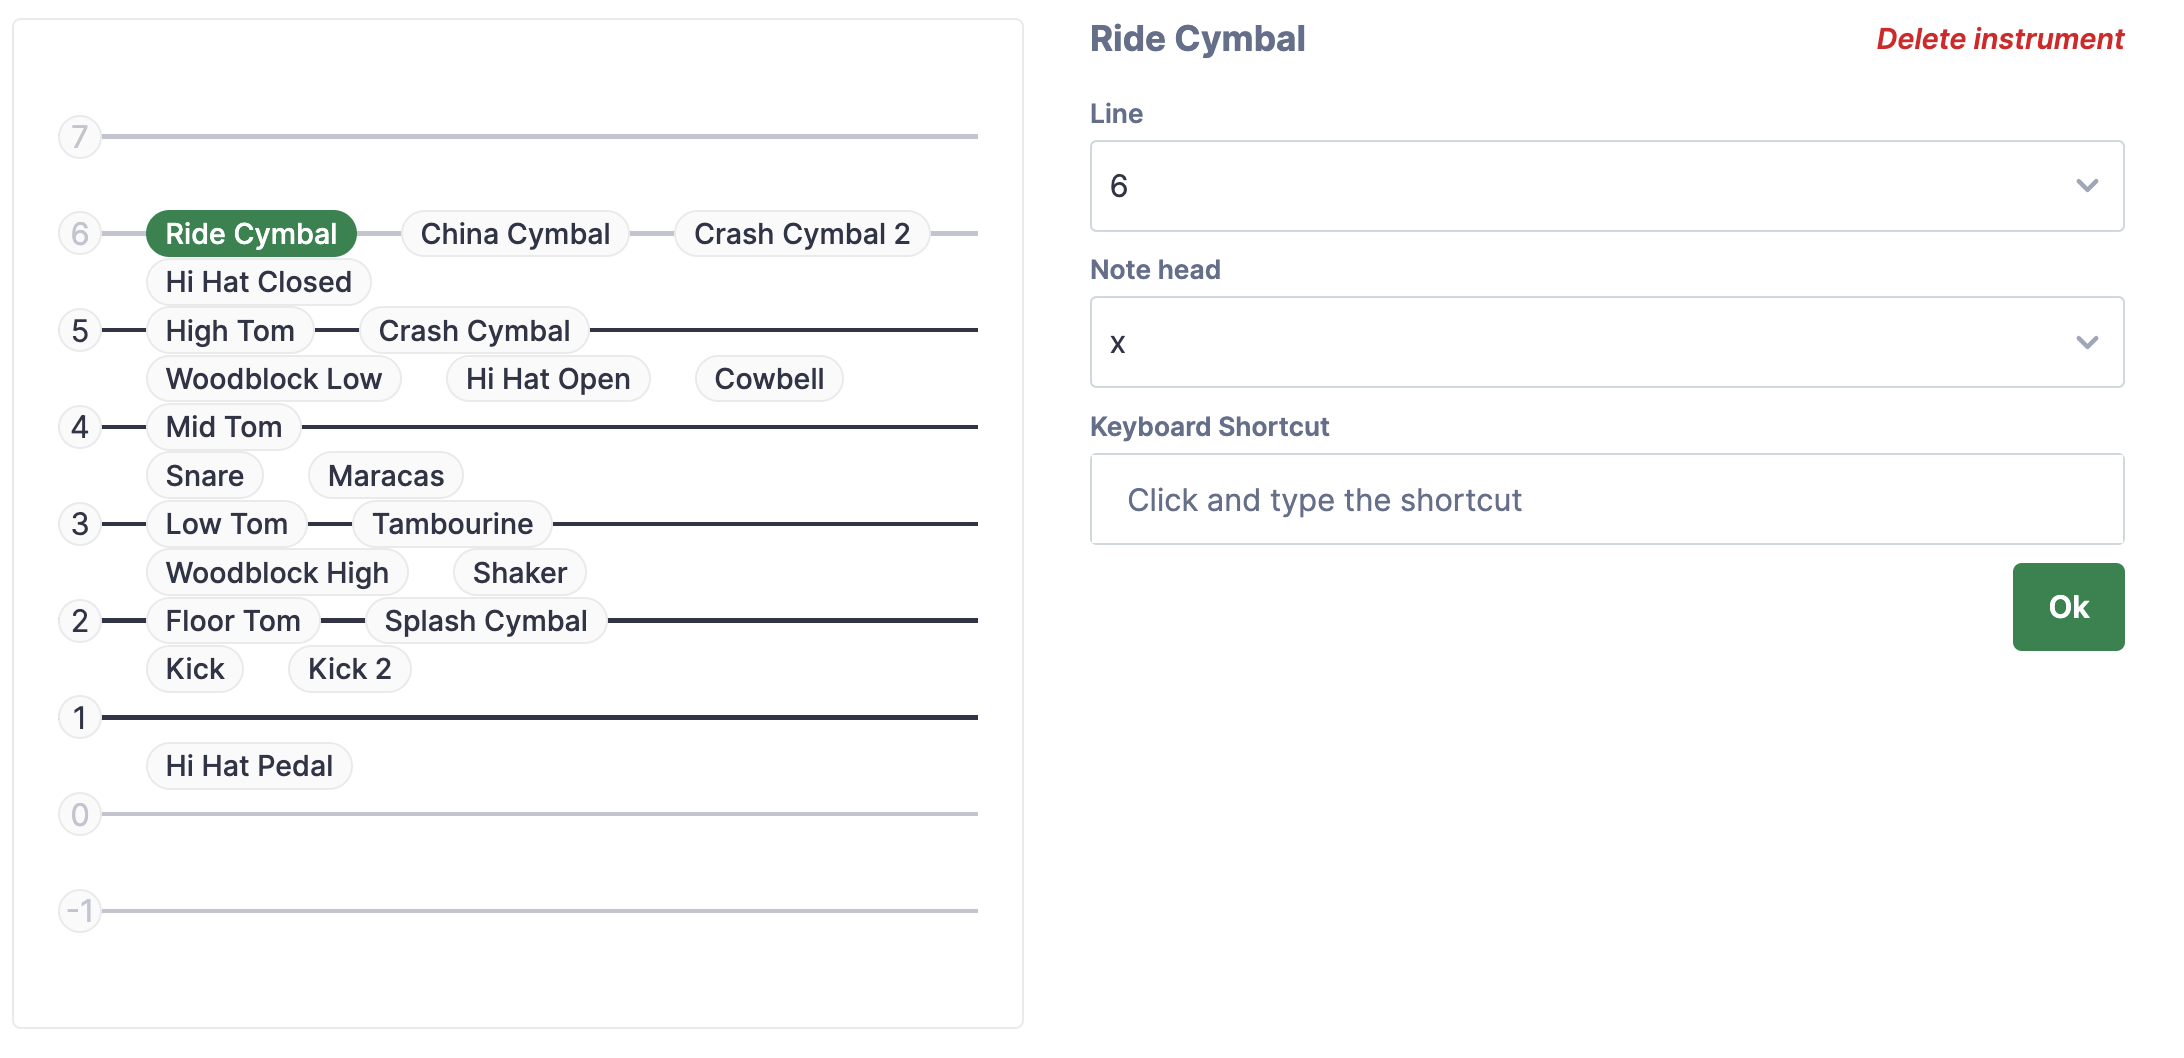
You can then choose all the percussions instruments you want to include in the part:
- Pick up a percussion instrument in the list
- Set the staff line from 0.5 to 5.5 for 5 lines (0 is at the bottom, 5 at the top), or 0.5 to 1.5 for single-line staves.
- Choose the note head you want to assign to the instrument.
- Optionally, you can set a custom keyboard shortcut for the instrument. For example, if you choose "X" for a closed hi-hat, when you will press "X" while editing the notation of the part, it will insert a note for the closed hi-hat with the chosen line and note head.
If you play an instrument different ways (e.g. Open and Closed Hi-hat), add all the playing ways to the configuration with different lines and/or different heads.
Here are the different heads you can use for your kit:
| Preview | Name |
|---|---|
 | Normal |
 | X |
 | Circle X |
 | Diamond |
 | Slash |
 | Triangle |
 | Back Slashed |
 | Slashed |
 | Square |
 | Cross |
 | Inverted Triangle |
 | Arrow up |
 | Arrow down |
| {:.feat.flist.index} |
Frequently asked questions
Where are my custom instruments saved?
In your Flat account, not in a single score. Once an instrument is saved it appears alongside Flat's own instruments whenever you create a score or add a part to an existing one, so the same configuration is reusable as often as you like.
Do I have to configure everything from scratch?
No. Start from a base instrument and Flat re-uses all of its settings, so you only change what you care about - a custom name, a specific tablature tuning, a different transposition mode, or a tweak to one of our preset drumsets.
How do I make an instrument that does not transpose?
Set its transposition mode to C and 0. That is the setting for an instrument that plays in concert pitch, where the written note and the sounding note are the same.
Can I set keyboard shortcuts for my own percussion kit?
Yes. Each percussion instrument in a custom unpitched configuration can take a custom keyboard shortcut, so pressing that key while editing the part inserts a note for that instrument with the line and notehead you assigned to it. See composing with drums for how they are used.