LTI 1.3 Setup Guide: Flat for Education and Schoology
Last updated October 1, 2026
Integrating Flat for Education with Schoology 1.3
Flat for Education integrates seamlessly with Schoology, offering music teachers a choice between the latest LTI 1.3 standard and the traditional LTI 1.1 (Legacy) method.
LTI 1.3
We strongly recommend using LTI 1.3 for all new installations. This method provides the most modern, secure, and streamlined experience, especially when deploying Flat for Education across a district for music teachers.
Key Benefits:
- Simple Setup: The setup only needs to be completed once by your district admin.
- Zero Setup for Teachers: Once the admin installs it, Flat for Education becomes immediately available in all courses. This means there is no installation or setup for teachers to manage. They can start using the tool right away, eliminating any need for them to add credentials or configure the app in their courses.
- Enhanced Stability: LTI 1.3 offers improved compatibility and a more reliable connection between Schoology and our platform.
LTI 1.3 (Step-by-Step) Installation for Schoology
Important Note: An admin account on your Schoology instance is required for this setup. LTI 1.3 only supports a single Flat for Education organization per Schoology instance. If you need to manage multiple organizations, please contact our support team before starting this process.
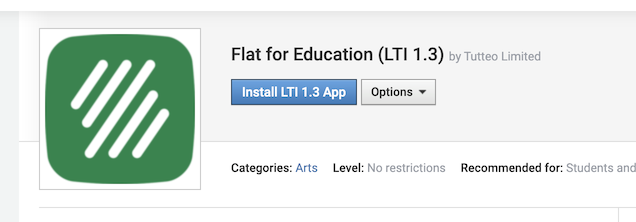
1. Start the Installation Navigate to our LTI 1.3 listing on the Schoology App Center and select Install LTI 1.3 App.
2. Accept Terms and Install for Your Organization
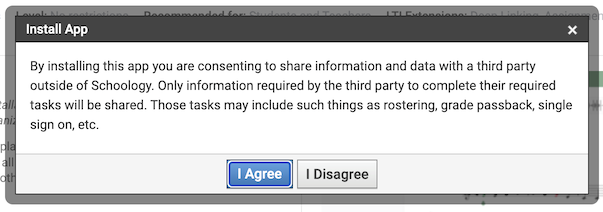
- Review and accept the data-sharing terms for Flat for Education. This enables essential features and support, including LTI extensions for automatically pushing grades back to Schoology.
- Choose the option to install the app for your organization.
3. Configure the App
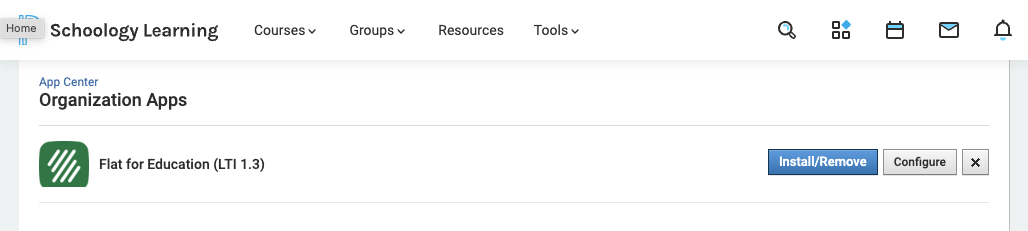
- Go to your Organization Apps, find Flat for Education, and click Configure.
- Enter the Custom URL as
https://flat.io/lti/launchand save the settings.
4. Get your Deployment ID
- On the same configuration page, copy your Deployment ID.
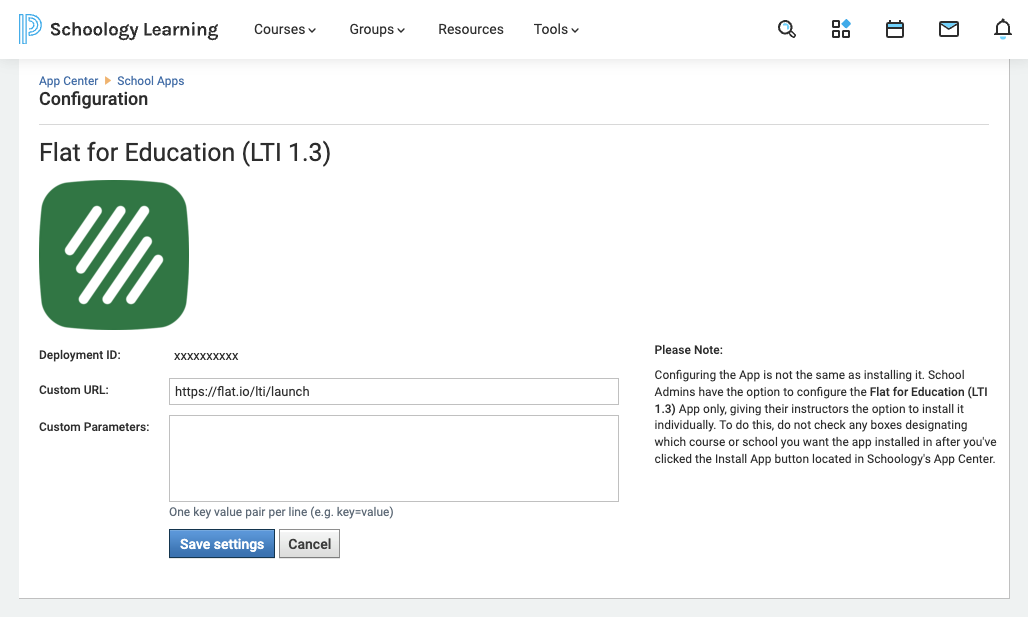
5. Go to Flat for Education
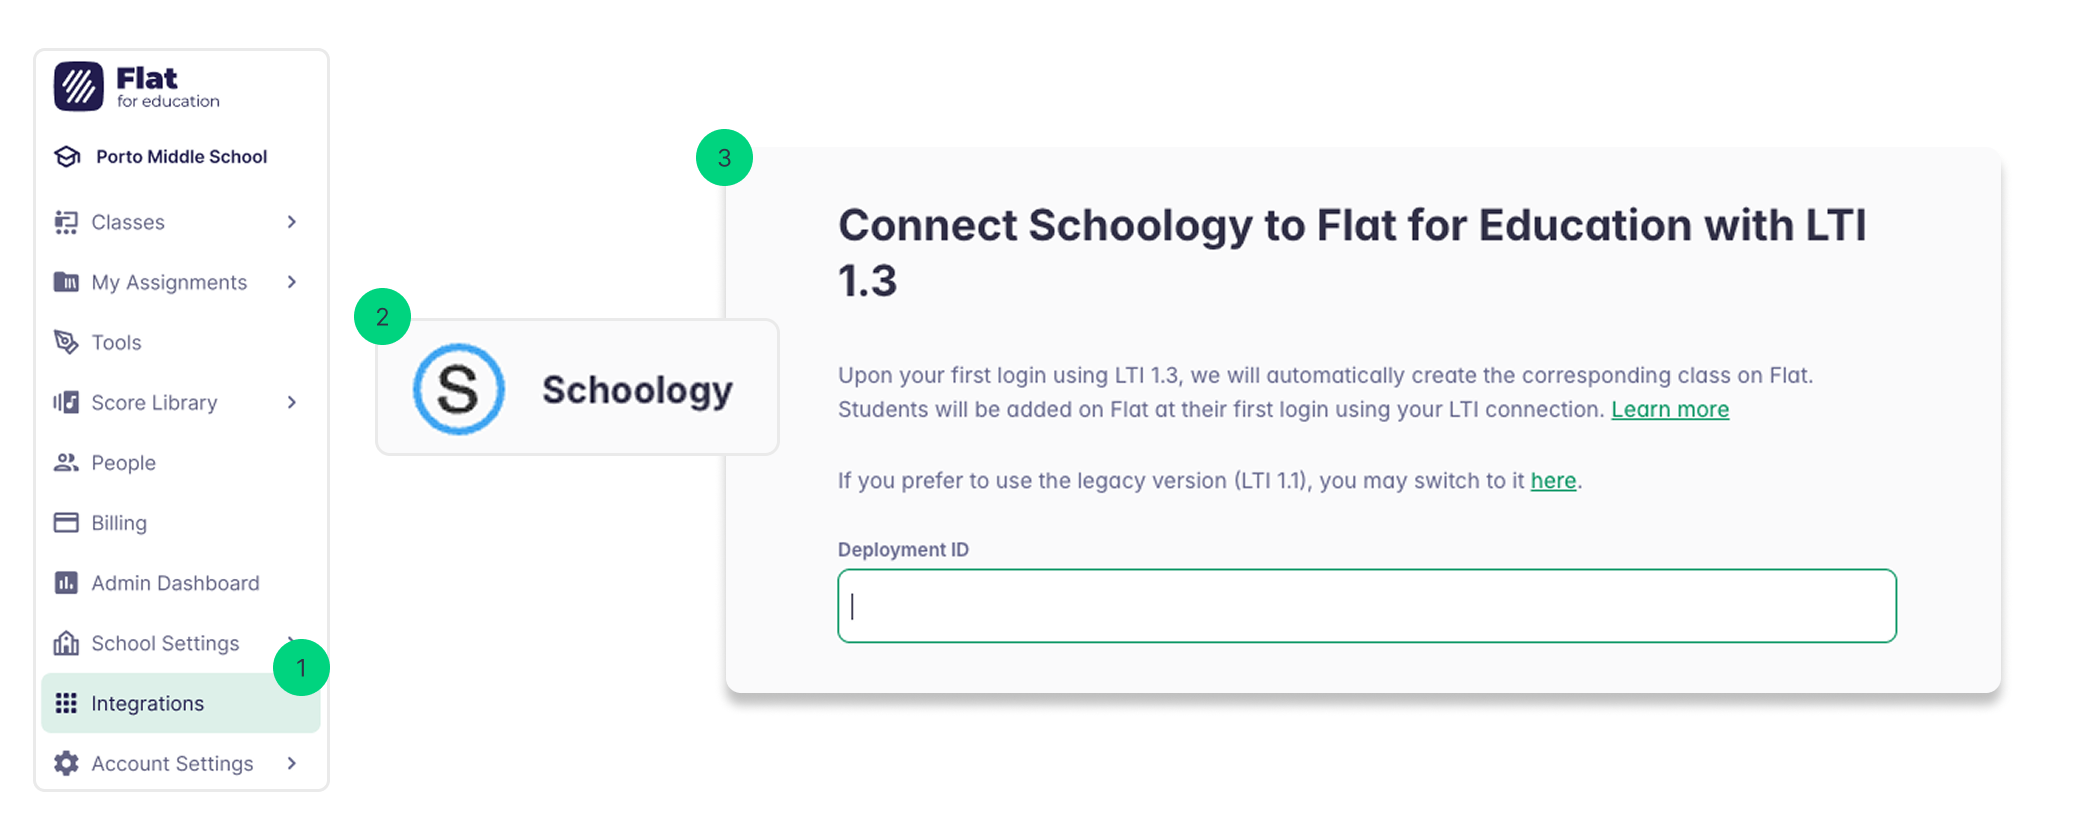
- Go to the integrations tab on the left-hand side menu and click on Schoology
- Add the deployment ID you just copied
- Done!
6. Make the app available in Schoology
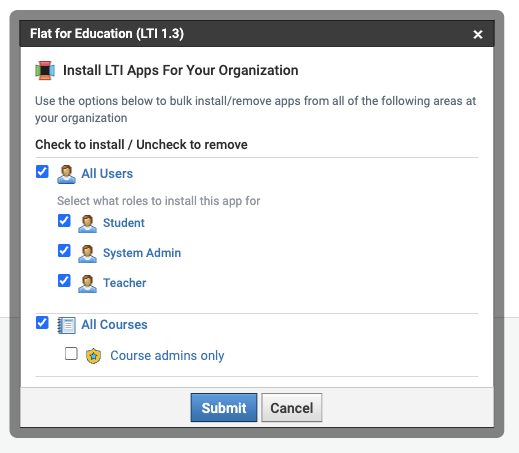
In your Schoology Organization Apps, find Flat for Education (LTI 1.3) and click Install/Remove.
Next, select All courses to make the app available across all your Schoology courses.
SSO (Single Sign-On), Account Provisioning and Rostering
The integration between Schoology and Flat for Education is designed to save you time on administrative tasks.
- One-Click Access: Students can access Flat for Education simply by clicking on the tool within your course navigation menu.
- Automatic Rostering: We automatically create accounts for your students and link existing ones based on the email addresses provided by Schoology.
- Automatic Class Setup: Classes are automatically created in Flat for Education and students are enrolled, allowing you to quickly start making assignments and sharing scores.
Assignments with Flat for Education in Schoology
Teachers add Flat for Education assignments to a Schoology course from the course Materials page, like any other Schoology material. The assignment comes from your Assignment Library, so create it there first (or use one of the samples).
Create a Flat for Education assignment in Schoology
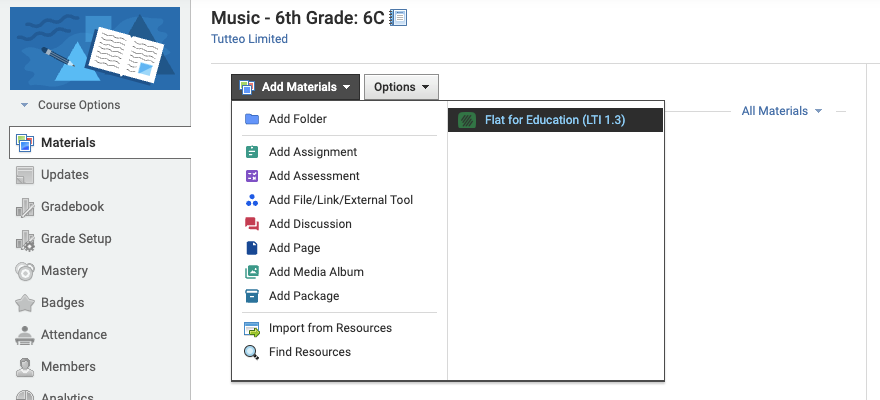
Open Add Materials in your course
In your Schoology course, open Materials, click Add Materials, then choose Flat for Education (LTI 1.3).
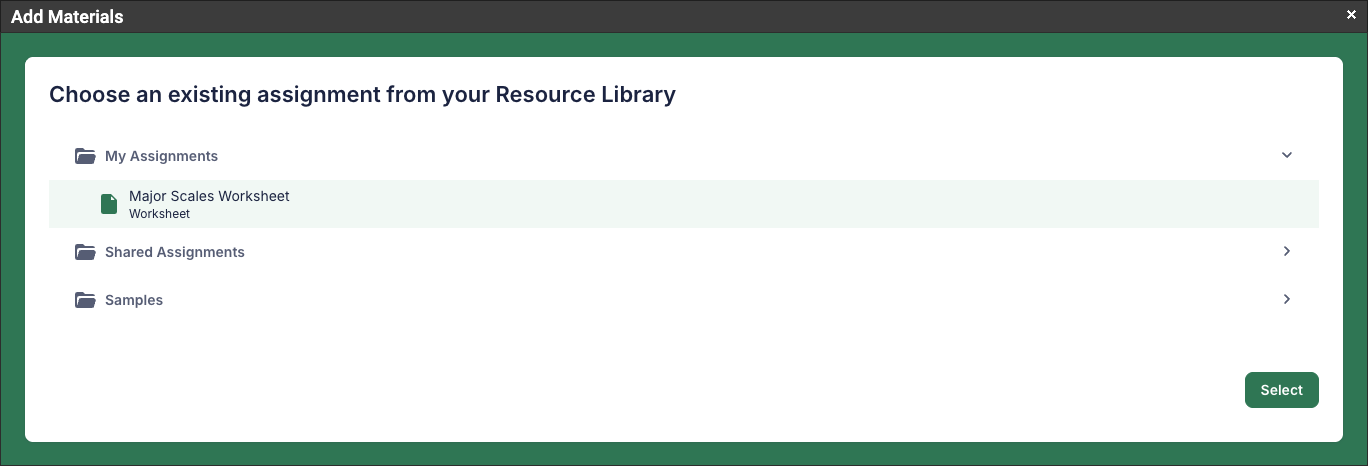
Pick an assignment and click Select
A window opens with your Flat for Education assignments:
- My Assignments: the assignments you created.
- Shared Assignments: assignments shared with you.
- Samples: ready-to-use assignments from Flat for Education.
Click the assignment you want to use, then click Select.
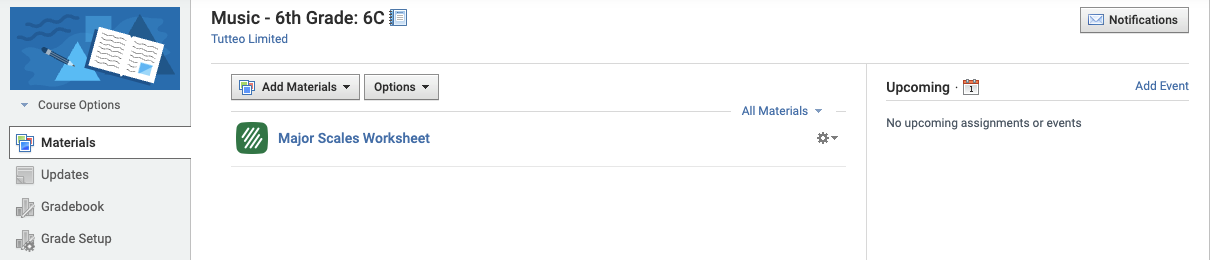
Find the assignment in your Materials
The assignment is added to your course Materials right away, already published for your students.
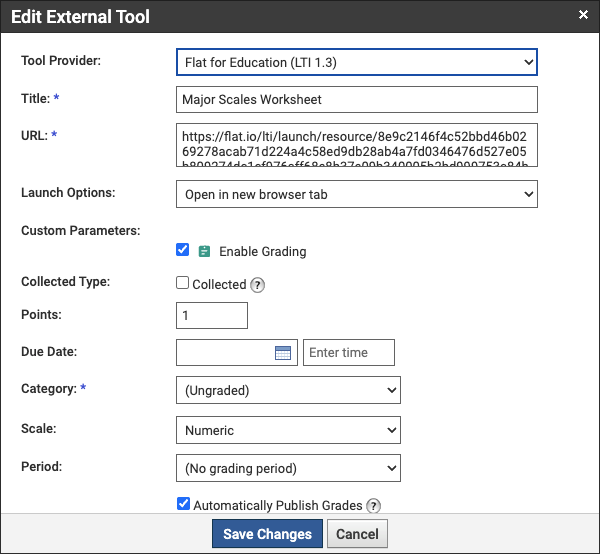
Set points, due date and grading category (optional)
To change the grading settings, click the gear icon next to the assignment, then Edit. Enable Grading is on by default. You can set the Points, a Due Date and a grading Category, then click Save Changes.
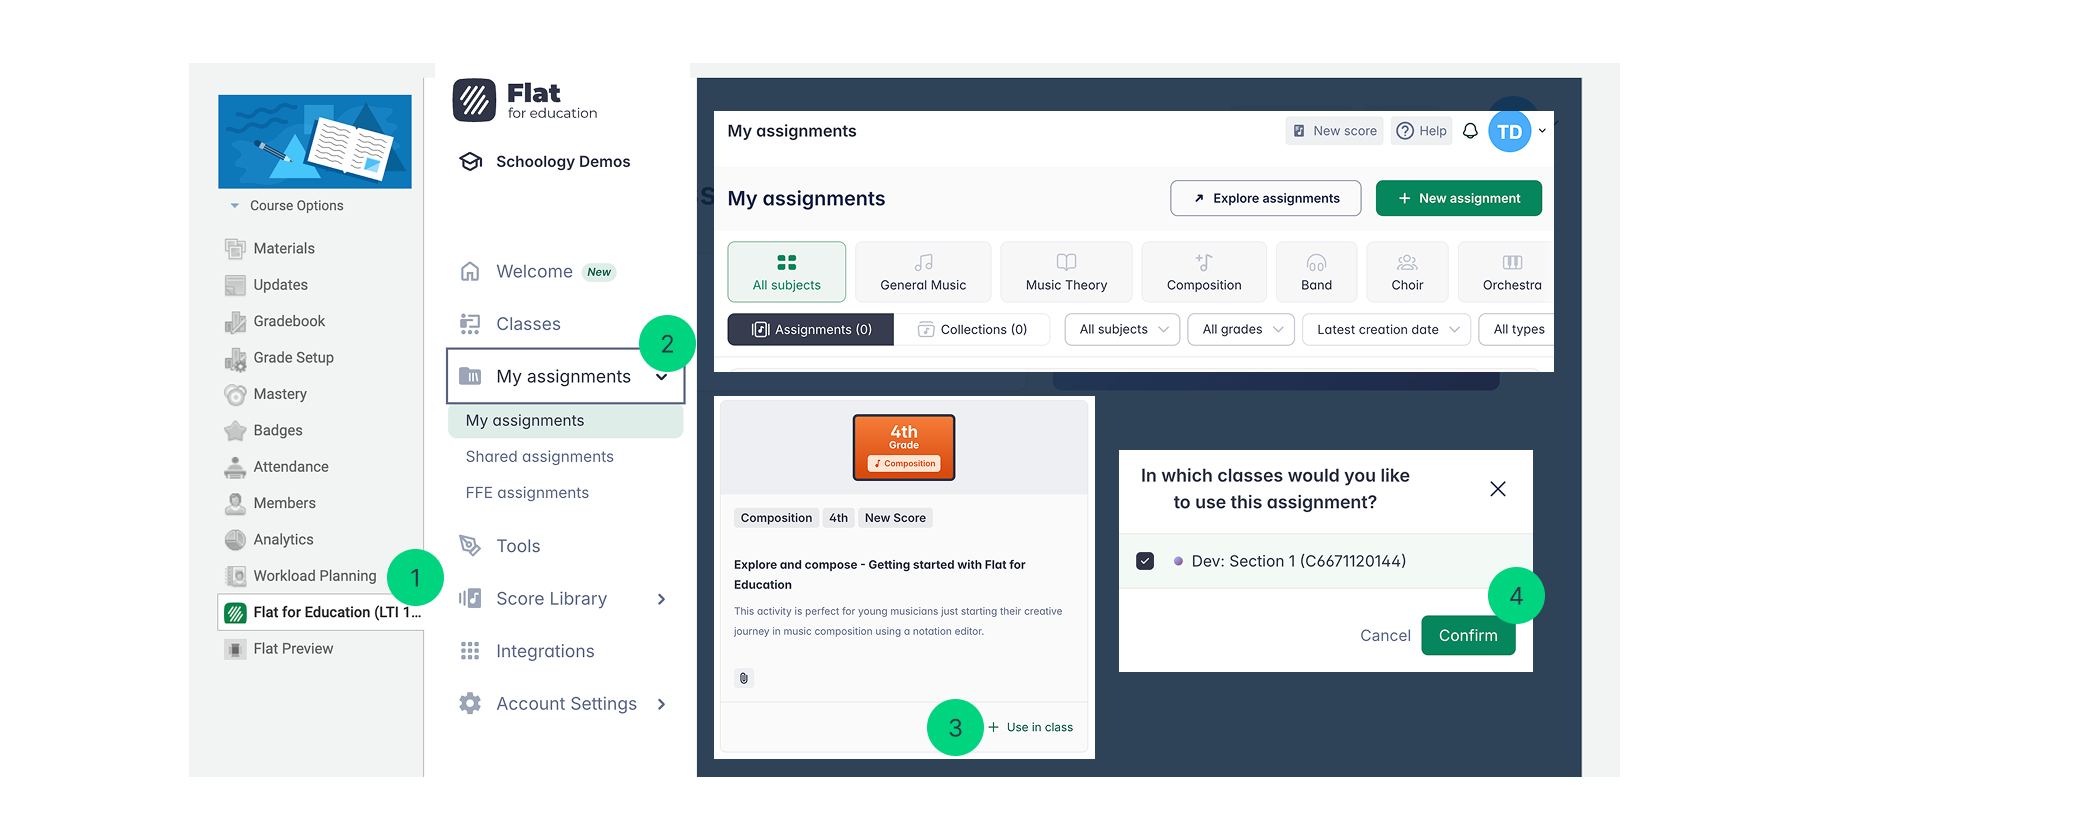
Alternative: assign from Flat for Education
You can also start from Flat for Education itself:
- Click Flat for Education (LTI 1.3) in your course sidebar.
- Open your Assignment Library, pick an assignment and click Use in class.
- Select the Schoology class(es) to send it to, then click Done.
The assignment appears in the Materials of each selected course.
What students see
When students open the assignment from Schoology, Flat for Education signs them in and links their account automatically. Their names then appear on the assignment page in Flat for Education, so you can follow their work, give feedback and grade it.
Music Notation with Flat for Education in Schoology
You can create or access all of your music notation scores directly from your library on Flat for Education. These scores can be used in two main ways: to create engaging assignments for your students, or to display musical examples on a screen during class.
How to Create a Score in Flat for Education
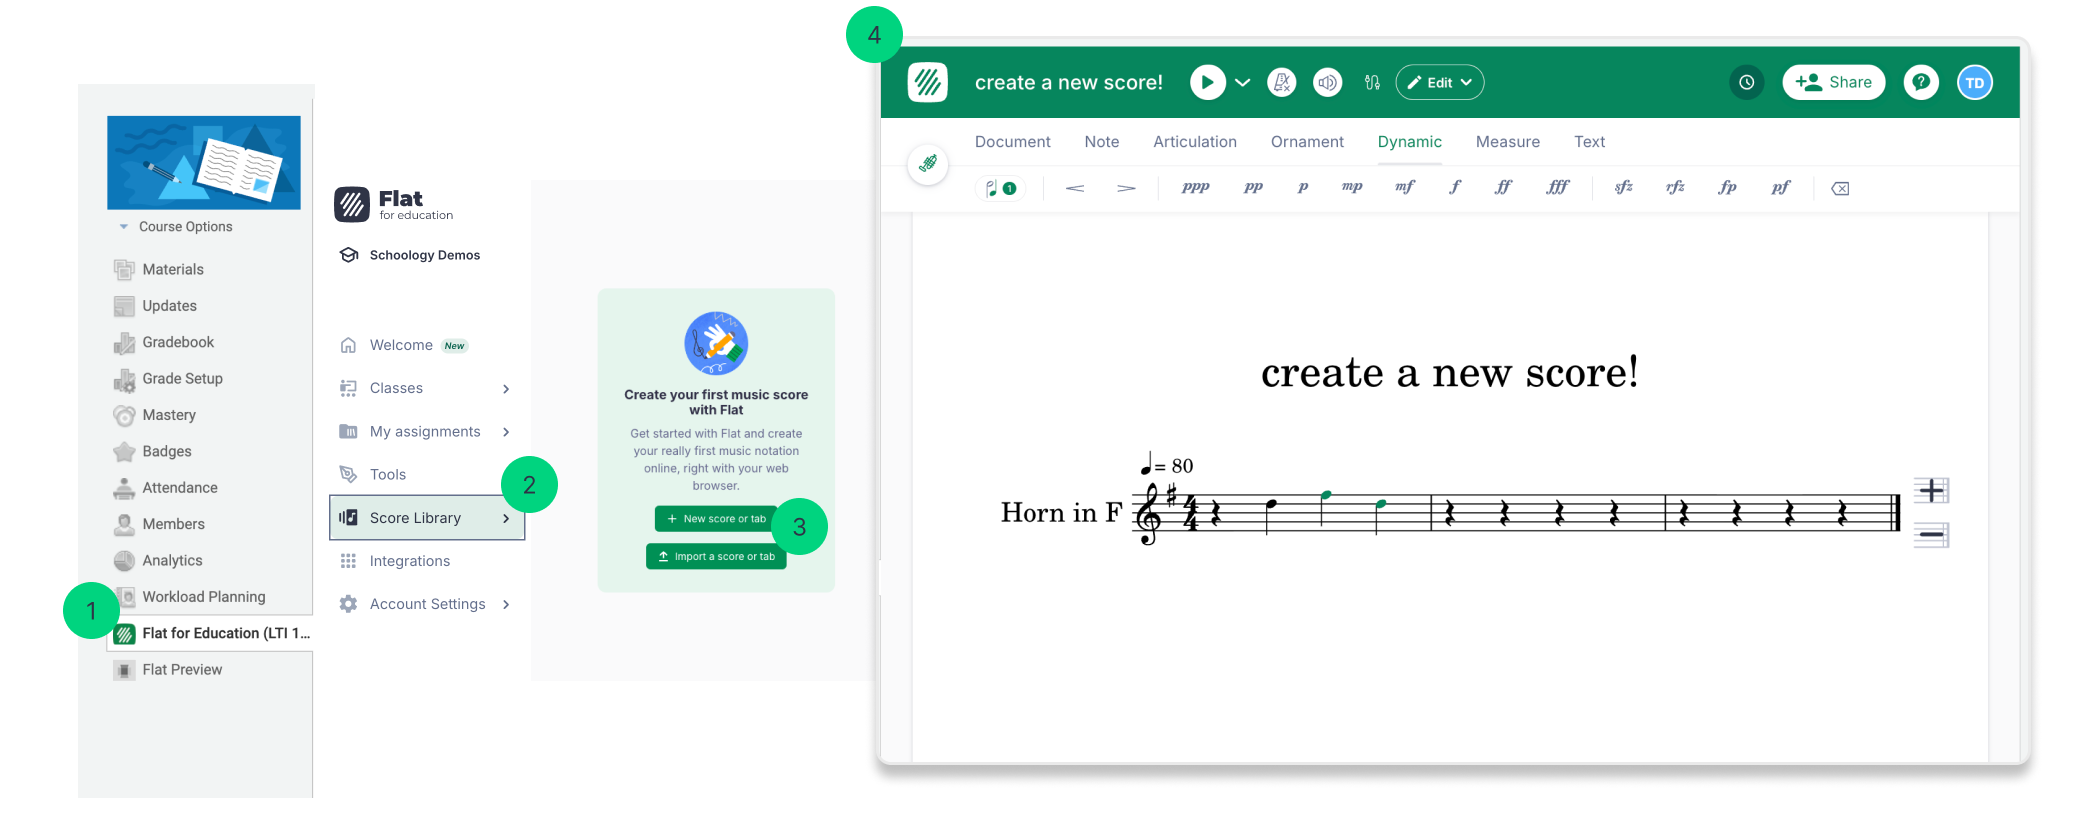
The easiest way to start a new score is to launch the application from the Schoology sidebar:
- Open the Flat for Education app from the course sidebar.
- Go to your Score Library.
- Click the New Score button.
From there, you have three options to begin creating content:
- Create from Scratch: Start a brand new, blank score.
- Import Files: Import existing music using standard files like MusicXML or MIDI.
- Import PDFs: Upload a PDF file and let our technology convert it into an editable score.
For a detailed guide on the score creation process, including importing files and choosing instruments, please see our dedicated help page: How to Create a Score